Team Viewer is most popular Desktop Remote control software.Team viewer having various versions.Team Viewer 8 is released in 2013.Team viewer updated new features from Version 7.In this new features screen session record option is there.While process is going in remote computer we cannot handle the computer capture the images or videos.
In Team Viwer recorded video will store in .tvs format..tvs format will play in Team viwer player.There is option to convert .tvs to .AVI format to play in all major video players.
Steps To Record Session :
– Install and launch Team viewer Application.
– Connect Remote computer using Team Viewer ID and password.After session start click on Extras —> Record —-> Start.

– It will start session record once complete Extras —> Record —-> Stop.
– Now Video will save in the Team Viewer installed folder.
Video Convert From .tvs to .avi Format:
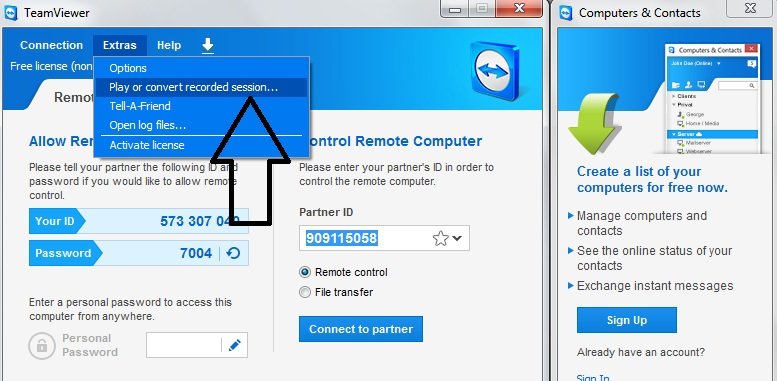
– Open Team Viewer and click on Play or Convert recorded session….

– Now video will start playing.In the right hand side there is option Convert.Click on that option.
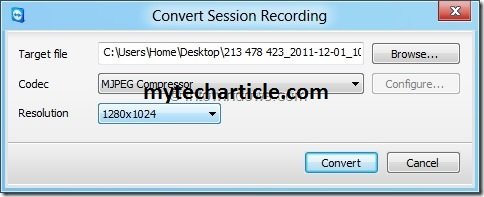
– It will ask for the Convert Session Recording options.
– Target File(File saved location)
– Codec( MJPEG Composer)
– Resolution(screen resolution)

– If there is any confuse on the codec format and resolution leave it as default.
– Now Click on Convert. It will start the process to convert.
– File saved in .avi Format.
Auto Session Record Option:
– There is another option to capture all session automatically.
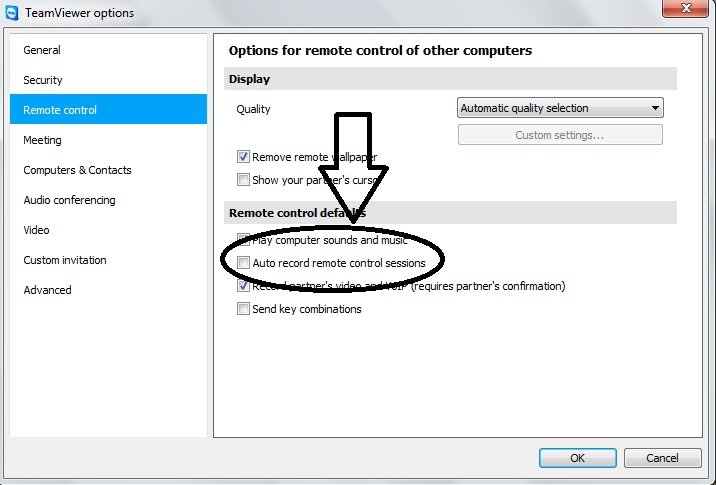
– Open Team viewer and go to Team Viewer Options.
– Click on Remote Control.
– Enable Auto record remote control sessions.
– Click on ok.It will start recording automatically from the next session.
Tags:TeamViewer,TeamViewer session,TeamViewer options,TeamViewer control,TeamViewer Remote Software,TeamViewer connect,TeamViewer Tutorials,TeamViewer latest release,Windows Articles,TeamViewer in windows,Hosting Articles


Add Comment