


How To Rename PC Name In Windows 10
In this topic we will discuss about the PC name change options in windows 10 OS.
Every PC or device needs a name to identify for communication with the other devices or networks.PC names are not big bother.Default names automatically assign but in some cases we need to add some of add text after the default.
Do remember before start this name change.You should login as Administrator.Only Administrator can change the PC name.
– Open Settings and choose System Icon.
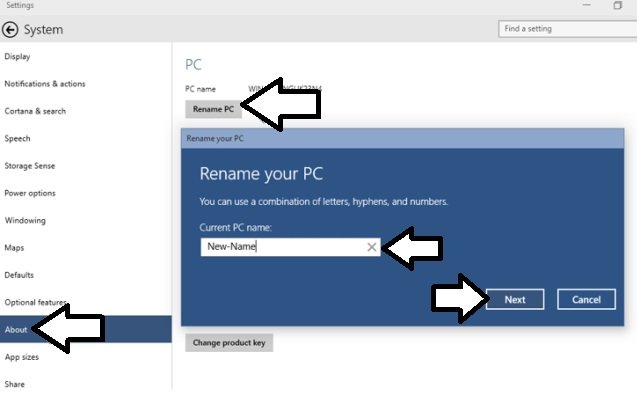
– Now go to About which is on lefthand side.
– Click on Rename PC on righthand side.
– Time to enter new name for PC and click on next.
– Automatically New PC name will applied on your pc after system reboot.
Second Method
– Instead of above all process from System Option.
– Open Control panel or use combination Win+x to open power menu.
– In option choose Advanced System Settings.
– Go to Computer Name and click on Change button.
– Enter the new name and click on Ok.Later restart the pc to apply the settings.

Third Method
From command prompt we can change the name of the PC easily.
– Open command prompt and use the following command to change the PC name.
– wmic computersystem where name=”%computername%” call rename name=”Newname”
– After name change restart the computer to reflect this changes.
Tags:Windows 10,Rename,WIndows 10 tutorials,Windows 10 install,Windows 10 review,g8k.in,Windows 10 preview


Add Comment